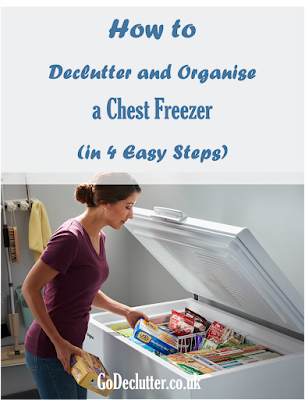
The Best Way to Organize Your
Chest Freezer (4 easy steps)
A chest freezer has the potential to become a food-filled abyss. Chest
freezers are notoriously difficult to organise, even though they are useful for
stocking up on sales items.
A chest freezer needn't be expensive and isn't difficult to organise.
I've created a simple four-step process for you if you need help organizing
your chest freezer.
Is a chest freezer right for me?
Consider
asking yourself a few questions if you're considering buying a chest freezer
and aren't sure if it's the right choice for you.
· Do you make batch meals in advance?
· Do you buy meat in large quantities and portion it out?
· Do you buy in bulk during sales, or do you freeze a lot of freshly
picked produce or homemade stock?
· Do you have a vacant room in your garage or basement?
If so, a chest
freezer can help you save money and make frozen food storage simpler.
The sizes of
chest freezers range from small/compact (5–9 cubic feet), medium (12–18), and
large (18+). Remember that a full freezer uses less energy than one that is
only partially empty.
How to organize a chest freezer
Step 1: Create categories
Group your frozen food in categories, I organise mine into Breads, Meats and Potato & Vegetable storage bins inside the freezer. I have been using this method for over 12 months and works fantastic for me.
Step 2: Place grouped items into storage bins that fit your freezer.
If your freezer comes with one basket or bin then great, but
you’ll need more.
You don’t need to spend a great deal of money on these, if
you have some leftovers from a previous organising project – just use those
(You don’t need to have matching boxes, it’s a storage system that just needs
to work for you.) If you did want to
purchase wire baskets these are good deals on amazon
Step 3: Arrange the bins in layers.
The layer system is the best option if you have a chest
freezer! Like its name suggests you layer the storages boxes on top of each
other – So this is how it works:
· Put one or two boxes on the bottom of the freezer
· Put another layer of 1-2 bins on top of those
· Put another layer on top.
· When you need something, you can simply remove boxes quickly and easily instead of digging loads of frozen goodies.
You could try arranging your boxes in opposing directions,
but do what works for your space. Tip: Put the most used items
on top and the least frequently used items on the bottom.
Step 4: Keep an inventory
Because you can’t always see all the items in the Chest
freezer, you can easily over-purchase certain items. So, find a way to keep
track of your frozen food - whether that’s an app on your phone, a whiteboard
attached to the wall by the freezer, or my free Freezer Inventory Printable.
How long does food last in the freezer?
If stored correctly frozen food can actually keep
indefinitely. The quality will be best if eaten within a certain timeframe. I certainly wouldn’t want to eat 3-year-old
frozen chicken. Here’s a rough guideline
for how long to keep your products.
FOOD |
FREEZER STORAGE TIME (0 degrees or below) |
|
Minced meat |
2-3 months |
|
Steaks |
6-12 months |
|
Chops |
4-6 months |
|
Roasts |
4-12 months |
|
Whole chicken |
1 years |
|
Chicken pieces |
9 months |
|
Fish |
3-6 months |
|
Soups & stews |
2-3 months |
|
Fruits & Vegetables |
8-12 months |
How to defrost a chest freezer
If your chest freezer is manually defrosted (many are), you’ll
have to get your muscles out for a spot of DIY.
When you see frost build up along the sides, it’s time to defrost your
chest freezer. Once a year is suitable for defrosting your chest freezers, and
it takes less than an hour. Here’s how:
· Empty the freezer, putting
· Unplug the freezer and open the lid
· Allow the ice to melt or gently chip away at it with a plastic or wooden spoon. Back in the old days – my mum would fill a bowl full of boiling water and place it in the freezer.
· Wipe away any water or food, with some kitchen roll.
Put everything back in, in the newly organised freezer
Hey, presto! 😊


